

For this cute bug I used the same basic construction idea as in the CD and Felt Pincushion.
Create and have fun!
What you’ll need
- Felt
- Two old CDs
- Compass to trace the circles
- Scissors
- Embroidery needle
- Embroidery floss
- Stuffing material (I use polyester stuffing and rice)
- Hot glue gun and a glue stick
- Scotch tape or duct tape or masking tape (optional)
- Wiggle eyes (optional)
How to make your ladybug pincushion
- Trace a circle, 21 cm (8,3 inches) in diameter, on the red felt using the compass and cut it out.
Download this template, print it at 100% and cut the head out of black felt.

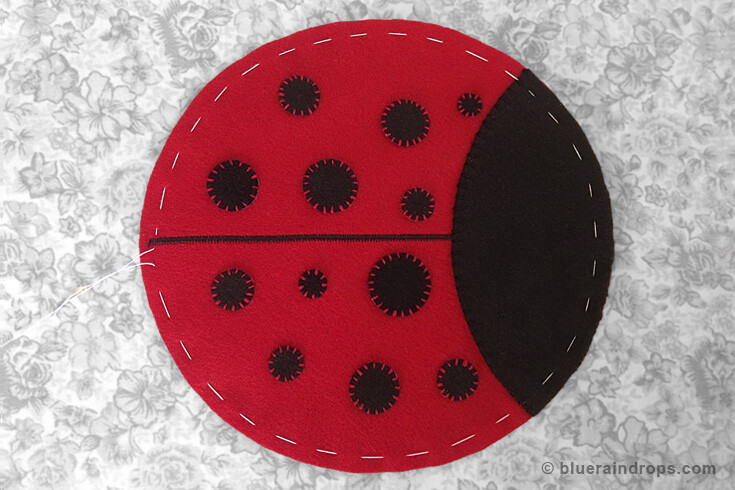
- Position the black piece (head) on the red circle, pin it in place. Using black thread, hand stitch (or use your sewing machine) in a fine straight or blanket stitch, along the inside curve of the head.
Fold in half and mark a center line using a marker. Hand stitch or stitch with your sewing machine along the marked line using black thread. I suggest satin stitch.

- Use the template to cut out some spots for your ladybug or make your own. You can make them all the same size or different sizes. Hand stitch them using black or red embroidery thread and simple straight stitch, running stitch or blanket stitch.

- Thread your needle with embroidery floss or a very strong thread, and knot it. Sew long running stitches, half a centimeter (a quarter of an inch) from the edge of the big circle all the way around. Do not tie off. Do not cut the long thread tails.
- Gather the circle and place your stuffing in the center. Use lots, you want it to be firm.
Place the CD on top of the stuffing and push it down, tucking the filling as you pull the gathering thread. Tie the thread tails together and secure with a few knots. If needed you can add more stuffing through the center hole. Be sure that the filling is evenly distributed. You can also add some rice through the hole that will keep your pins free of rust. Spread the gathers out evenly.

- Use the compass and trace a circle, 16 cm (6,3 inches) in diameter, on the black felt and cut it out. Thread your needle again with embroidery floss or a very strong thread and knot it. Sew long running stitches, half a centimeter (a quarter of an inch) from the edge of the circle all the way around. Do not tie off yet.
Cover both sides of the CD hole with some scotch tape.
Put the CD in the center of the circle. Pull the thread tails tight and gather. Tie the thread tails together and secure with couple of knots.

- Hot glue the two parts of your pincushion. Press firmly.
For a neater look you can hand stitch the two parts, after gluing them, using a blind stitch as it is shown in the right side of the photo.

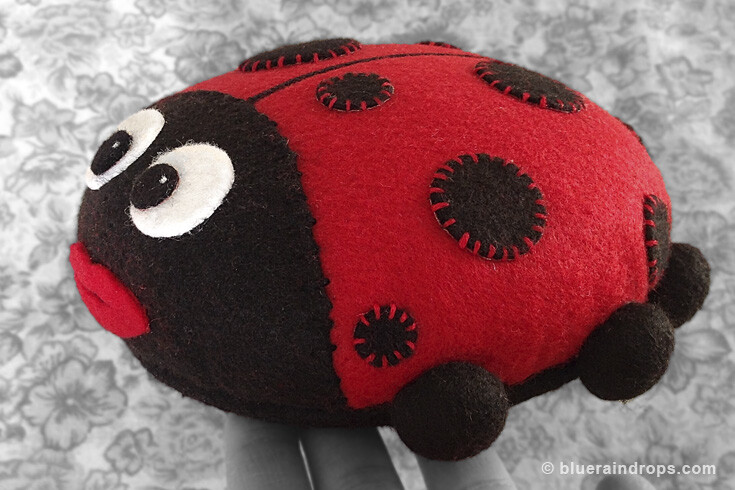
- To make the legs, trace and cut out of black felt 6 circles measuring 4 cm (1 and a half inch) in diameter.
Thread your needle with embroidery floss or a very strong thread, and knot it. Sew long running stitches, half a centimeter (a quarter of an inch) from the edge of the circle all the way around. Do not tie off. Do not cut the thread tails.
Gather the circle and place your stuffing in the center. Tie the thread tails together and secure with a few knots.

- Hot glue the legs on your ladubug.

- Something is missing… Our bug is not alive yet, not without a face.
You can glue googly craft eyes or make your own using felt. Make a mouth, also out of felt or embroider one with red embroidery floss.
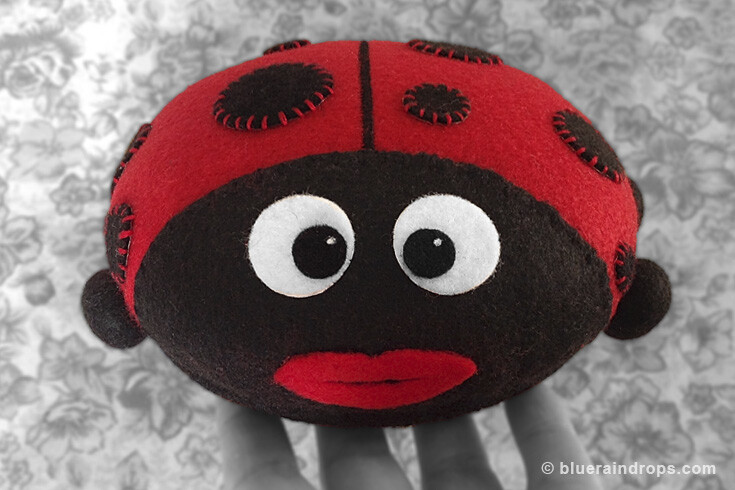
- Now, she or he is ready for work.
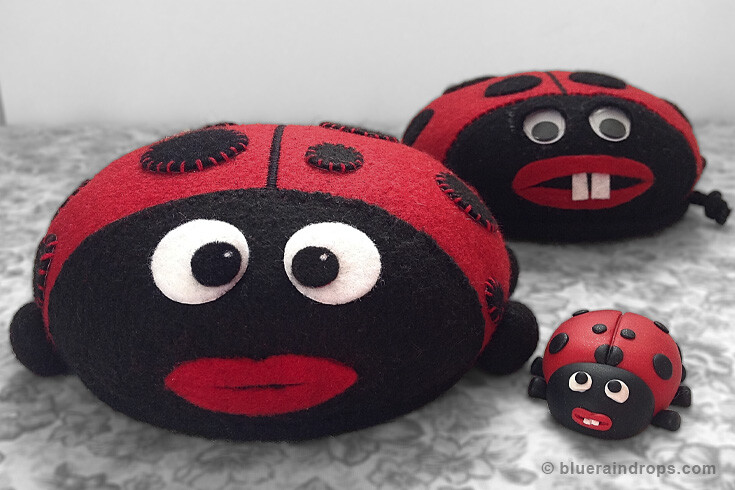
- Hanging out with friends… The little one I made with polymer clay.
Tips and ideas
- Another way to make legs for your ladybug is to use pieces of black rope or black pipe cleaner. In this case, you have to glue the legs between the two parts, before gluing the upper and the bottom part together.
- Decorative stitches I suggest:
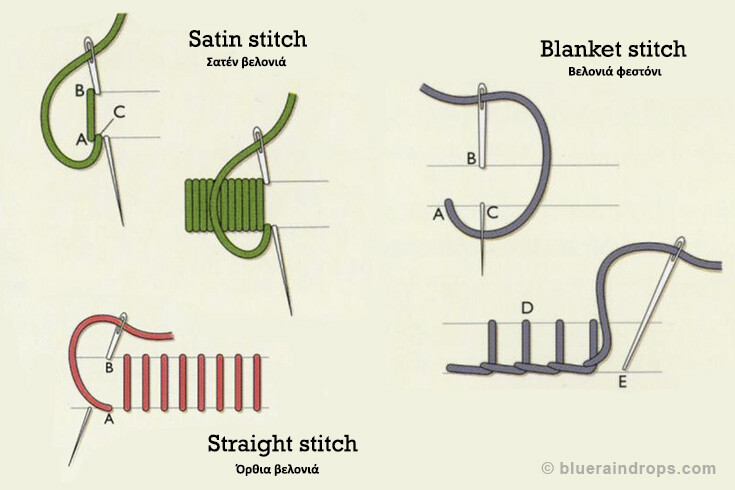


[…] Ladybug Felt Pincushion This extremely cute ladybug is a big pincushion, with enough space for all your pins. In the […]