

No sewing experience is needed to make this big (a little bigger than a CD in diameter) pincushion. Use its surface to create your own unique pincushion.
So, let’s create and recycle.
What you’ll need
- Felt
- 2 old CDs
- Compass to trace the circles
- Scissors
- Embroidery needle
- Embroidery floss
- Stuffing material (I use polyester batting and rice)
- Hot glue gun and a glue stick
- Decorative rope, trim or ribbon
- Beads or sequins (optional)
How to make it
- Trace and cut out 2 circles from the felt you chose for your pincushion. One big circle (top part) measuring 21 cm (8,3 inches) in diameter and one smaller (bottom part) measuring 16 cm (6,3 inches) in diameter. You can make your own tree silhouette or use this template (print at 100% scale). Staple and/or tape the paper template to the felt you chose for the tree. Cut out the felt. Remove the template and you should have one felt tree silhouette.

- Pin your tree in the center of the big circle. Hand stitch the outside edge of the tree to the felt circle with matching black thread in a very fine whipstitch. You can place small bits of filling under the tree to add dimension. With embroidery floss make the little pointy branches. Embellish with some beads or sequins for extra sparkle.

- Thread your needle with embroidery floss or a very strong thread, about a meter long (39 inches) and knot it. Sew long running stitches, half a centimeter (a quarter of an inch) from the edge of the big circle all the way around. Do not tie off. Do not cut the long thread tails.

- Gather the circle and place your stuffing in the center. Use lots, you want it to be firm.

- Place the CD on top of the stuffing and push it down, tucking the filling as you pull the gathering thread. Tie the thread tails together and secure with a few knots. If needed you can add more stuffing through the center hole. Be sure that the filling is evenly distributed. You can also add some rice through the hole that will keep your pins free of rust. Spread the gathers out evenly. Put some tape to close the hole.

- Thread your needle again with embroidery floss or a very strong thread and knot it. Sew long running stitches, half a centimeter (a quarter of an inch) from the edge of the small circle all the way around. Do not tie off. Cover both sides of the CD hole with some tape.

- Put the CD in the center of the circle. Pull the thread tails tight and gather. Tie the thread tails together and secure with couple of knots.

- Glue the two parts of your pincushion with the glue gun. Press firmly.

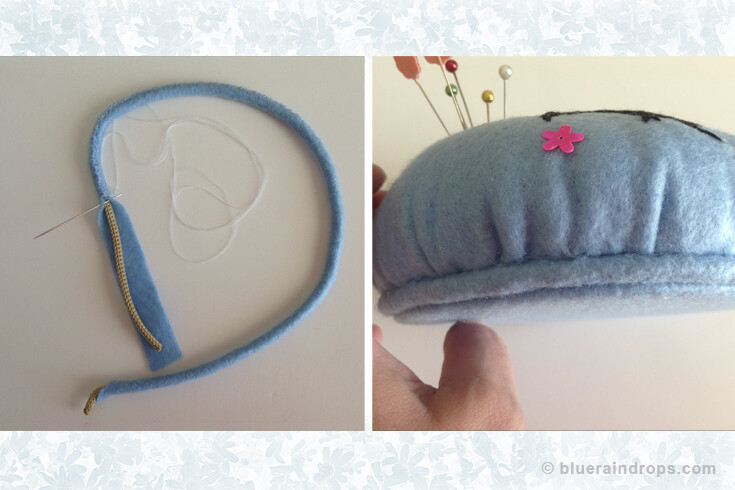
- Embellish with decorative rope, trim or ribbon secured with hot glue (the orange rope in this photo is the handle from a paper bag).

- If you want your rope to match exactly the color of your pincushion, make your own using a piece of rope and a strip of felt.
- The pincushion is ready.

- These are also CD felt pincushions

Tip
- If the felt or the fabric you want to use is thin or transparent, you can line it with a circle of flannel or interfacing. Place the felt and lining together and treat them as one piece.


[…] CD and Felt Pincushion A shadow tree on a big and beautiful pincushion. Besides the free template, in this tutorial […]
[…] this cute bug I used the same basic construction idea as in the CD and Felt Pincushion. Create and have […]