

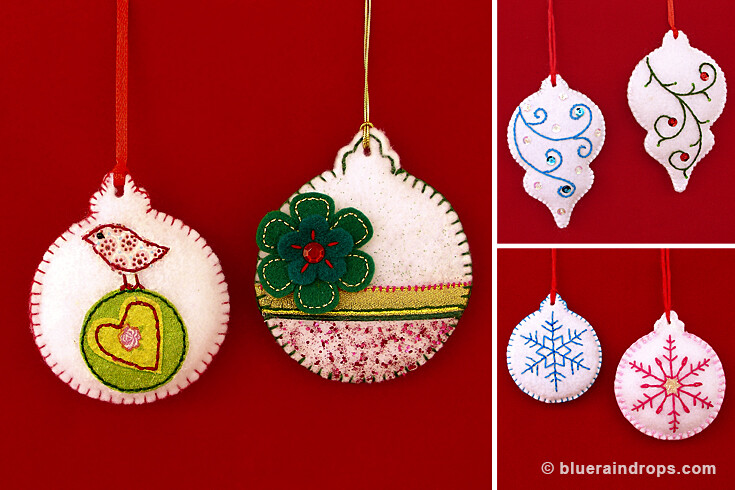
Make these easy felt baubles and use them as ornaments for your Christmas tree. Have a very Merry Christmas!
What you’ll need
- Acrylic felt
- Embroidery needle
- Embroidery floss
- Scissors
- Quilt batting
- Ribbons, beads, sequins, rhinestones, buttons, glitter glue, embroidery floss, scrap felt (optional for decoration)
- A piece of ribbon, yarn or thread to hang the ornament
- Hole punch (optional)
How to make your own Christmas felt bauble ornaments
- Download this free template. You can choose to print only some of the shapes and resize them as you like since they are vectors.
- Instead of tracing (using chalk or a marker), I recommend securing the paper with the printed shape on the felt with a stapler and cut both paper and felt. This way the shapes are going to be perfect.
For each ornament you need to cut out two of the same bauble shapes and one small “cap” piece (optional).
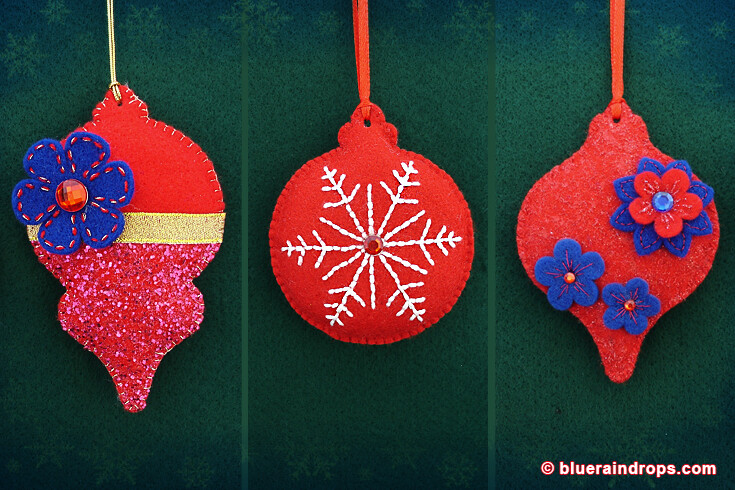
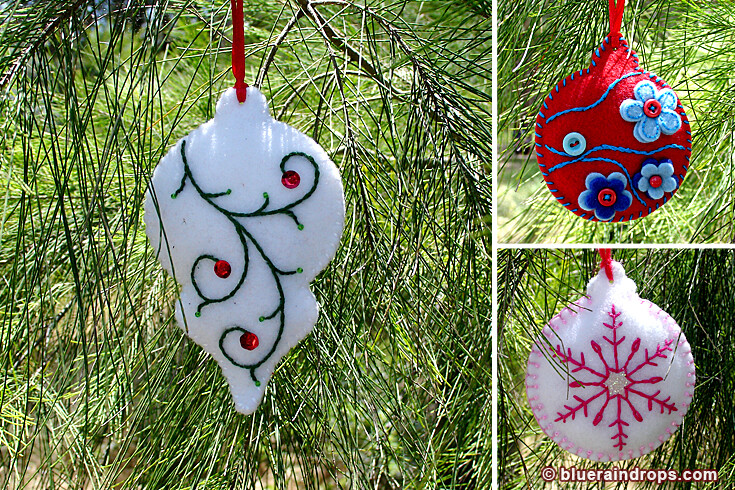
Also, cut one slightly smaller ornament shape from the quilt batting. - Decorate one of the two pieces. Use my photos for inspiration. You can embellish your ornaments with ribbons, beads, sequins, rhinestones, buttons, glitter glue, embroidery, sewing machine decorative stitches, little felt flowers, felt shapes, crocheted snowflakes. On some ornaments I even used glitter nail polish and paper napkins (decoupage).
To embellish with ribbon or ric rac, cut a piece a little longer, sew in place using a simple running stitch or a fancy embroidery stitch, then fold the ends taking care not to distort the shape and secure them in place on the back side of the felt with a few whipstitches.
To decorate with felt shapes or little felt flowers, sew them in place or glue them on. My preferred glue for felt is Crafter’s Pick The Ultimate.
To embroider the felt, you can use a variety of embroidery stitches such as running stitch, backstitch, stem stitch, chain stitch, cross stitch and create random lines and shapes or embroider a more intricate pattern. To do so, I used white paper napkin (I didn’t have any tissue paper). I traced the design I wanted on the napkin, then I taped the napkin on the felt and embroidered the design. The napkin is extremely soft, so I had to be very careful, but it is very easy to remove afterwards using tweezers.
You can also use your sewing machine to embroider the felt using decorative stitches that most of the machines have.
To decorate with glitter glue. It stiffens the felt, so stuff first, sew the pieces together and use glitter glue (or even glitter nail polish) at the end. - Place the small “cap” piece at the top of your ornament and sew it in place using vertical stitches (the “cap” is optional).
- Place the quilt batting between the two ornament pieces and baste or pin the layers together. Sew around the edge of the ornament (only the felt, not the batting) using a blanket stitch or a whipstitch.
- Use a hole punch to make a hole at the top of the ornament.
Thread a piece of yarn, ribbon or thread through the hole to hang the ornament.
Tips and ideas
- Find more Christmas felt ornaments here.
- Instead of quilt batting, you can also use stuffing material. In this case, sew the two pieces together, but not all the way around. Leave an opening for stuffing. Stuff to desired plumpness and stitch up the opening.


[…] Find a tutorial with a free template for more felt ornaments here. […]