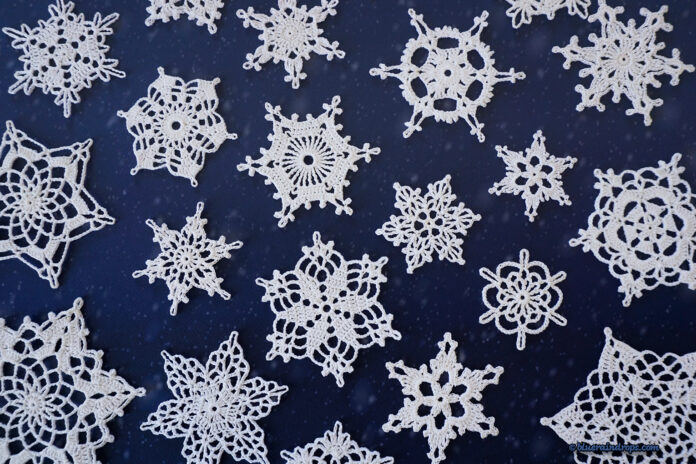
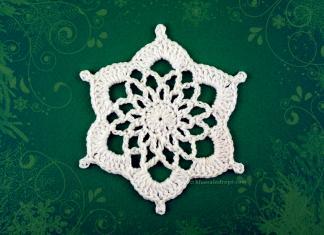
From Yarn to Wow: The Transformative Power of Blocking
Why Blocking is Essential for Stunning Crochet Snowflakes
When you’re making those gorgeous crochet snowflakes, blocking is a step you definitely don’t want to skip. So, what’s blocking all about? It’s basically shaping and setting your finished pieces to make them look even more fabulous than before. Think of it like giving your snowflakes a little spa treatment! If you’ve ever thought about why you should bother with it, here’s the deal – it gives your snowflakes that crisp and delicate look that really makes them pop.
Some blocking techniques can even stiffen up your crochet snowflakes so they keep their shape when you hang them up. Without this step, your beautiful creations might end up looking more like lumpy blobs than the intricate designs you imagined. By using different finishing techniques during blocking, you’ll not only preserve the gorgeous details of your snowflakes but also guarantee that they look just as stunning as you’d hoped they would.
Now, while this post focuses on blocking crochet snowflakes, the information, techniques, tips, and tricks here can easily be applied to all your crochet items.
So seriously, don’t miss out on this important part! Make blocking a regular part of your crocheting routine to take your projects to the next level and show off every stitch at its best. Trust me; take a little extra time with this step and once you see how much better they turn out after being blocked, you’ll wonder how you ever did without it!
Blocking Techniques for Perfect Crochet Snowflakes
When you’re diving into the world of blocking crochet snowflakes, you’ve got a bunch of cool methods to pick from, each with its own little quirks. The best one for you really depends on what kind of fibers you’re using and how firm you want those pretty flakes to be. Let’s break it down so you can find your perfect match.
Wet Blocking: This is the classic go-to. You soak your snowflakes in water, gently squeeze out the extra moisture, and pin them onto a blocking mat to dry. It’s simple and works like a charm but needs some patience while they dry out completely. Perfect for natural fibers like cotton or wool since it helps them settle into their shape beautifully.
Spray Blocking: If you’re short on time but still want that crisp look, spray blocking is your buddy. Just mist your pinned snowflakes until they’re damp – not drenched – and let them dry. It relaxes the yarn fibers and smooths things out nicely without much hassle.
Steam blocking: Just hover a steam iron above your work without touching it, and let the steam work its wonders. It’s fast, keeps things dry – at least drier than wet blocking – and is perfect when you need those details to pop. It’s the go-to method for blocking acrylic yarns and fibers that don’t handle wet blocking well. However, never apply direct heat to your crocheted piece, especially if it’s acrylic, as the fibers can melt. Keep the iron at a safe distance!
Glue Blocking: Want those snowflakes to stay put forever? Try glue blocking! Mix white school glue with water, apply it to your flakes, shape them up, and once they’re dry – they’re set for life! Super stiff finish but less flexibility.
Starch Blocking: Similar to glue blocking but not as rigid, starch provides structure with some softness. After soaking, the item is pinned to a blocking mat and allowed to dry completely, which can take up to 24 hours. This method is ideal for cotton or linen projects where flexibility is needed without losing shape.
Spray Starch Blocking: For more control over stiffness than wet blocking offers – spray starch directly onto pinned pieces after shaping them just right!
So how do these compare? Glue blocks are super stiff; starch blocks follow closely behind; wet blocks are softer; steam gives a nice balance between firmness and drape.
When picking which method suits your crochet snowflakes best think about what fiber you’re working with plus how firm or flexible you want them in the end – it’s all about finding what fits YOUR style!
No matter which way you go remember practice makes perfect!
How to Choose the Best Blocking Method
When you’re picking a blocking method, there are a few things to keep in mind to make sure your project turns out just right. First, check out the yarn fibers you’re using. Acrylic is great because it holds its shape well, but it might not react as much to blocking as cotton does. Cotton’s got more drape and is super easy to work with, which makes it awesome for certain projects.
Then, think about how you want your finished piece to feel – do you want it stiff and structured or soft and flowy? This will help you decide on both the yarn type and how you’ll block it.
Also, consider how easy each method is – some need more tools than others. If you’re pressed for time or don’t have many tools handy, steam blocking could be your best bet since it’s fast and doesn’t need much setup compared to wet blocking.
Finally, think about where you’ll be working. Humidity can slow down drying if you’re wet blocking, while dry heat can speed up evaporation when steaming. Keeping these factors in mind will help you pick the perfect blocking method for your project so you get those gorgeous results you’re after!
My Personal Adventure in Blocking Crochet Snowflakes
For years after I started crocheting, I used glue blocking on my snowflakes. Here’s how it works: mix white school glue with water (usually a 1:1 to 1:1.5 ratio), soak your snowflake, squeeze out the excess, and pin it to a foam mat to shape it. After drying for about 20-24 hours, your snowflake will be nice and stiff – perfect for ornaments.
However, over time, I noticed some downsides to using glue. It can make the yarn feel stiff and brittle, which isn’t great if you want a soft touch. Plus, glue can dull shiny threads and might even turn yellow over time. It’s also messy since you’re dealing with a watery solution that gets everywhere! Once you’ve glued them, they’re not washable unless you remove all the glue first – a real hassle.
Since I mostly use cotton and acrylic yarns aiming for a slightly stiff but not plasticky look, I decided to try other techniques. Brushing the glue on just one side, either the right or the wrong side of the crocheted snowflakes instead of soaking it entirely, was less damaging and less messy but still had its issues.
Then came spray starch blocking! This is my current go-to, and here is how you do it:
- Step 1. Prepare the blocking surface by covering your foam mat with plastic wrap to protect it (optional).
- Step 2. Download the free blocking template, print it and tape it to the blocking surface.
- Step 3. Lay the snowflake on the template. Start by pinning the center, then pin the tips and points of the snowflake to the blocking surface, gently stretching and shaping it into the desired symmetrical form.
- Step 4. In a well-ventilated space, spray the snowflake with starch. A heavier application results in a stiffer finish.
- Step 5. Let it dry completely. The time may vary depending on the temperature, humidity, and how much starch you used.
- Step 6. Once dry, carefully remove the pins from your newly stiffened and beautifully shaped snowflake. Your ornament is ready for display.
This method has been working great so far without all those pesky problems from using glue!
Tips and Tricks for Achieving the Perfect Blocked Snowflake
Creating the perfect blocked snowflake is all about having a bit of finesse and patience. No matter which blocking method you choose, here are some handy tips and tricks to keep in mind! With these pointers, you’ll be crafting stunning blocked snowflakes that are sure to impress.
- First off, grab your free blocking templates – they’re total game-changers! Seriously, I can’t stress enough how important these templates are. They help shape your snowflake evenly and keep those delicate points in check.
- Use rust-proof pins to avoid any unwanted stains.
- When shaping the snowflake, be gentle. Pins should maintain shape but not force it – don’t overstretch. Take your time here; patience really pays off when you’re aiming for that perfect look!
- Pinning must be done carefully because once it dries, you’ll have to wash it and start over if there’s a mistake.
- Keep the shape after blocking by using the right materials. Avoid flimsy pins or subpar boards that won’t hold your snowflakes securely in place.
- For extra stiffness, if needed, give it another spray, and let it dry. You can also spray the wrong side for added stiffness.
- As for drying time – be patient! Different materials dry at different rates so don’t rush this step or you’ll end up with a floppy instead of crisp design. Remember: good things come to those who wait!
- Handle with care: Spray starch isn’t permanent; if you wash the snowflake later on then re-blocking will be necessary again.
Conclusion: Blocking Makes All the Difference in Crochet Snowflakes
So there you have it! Blocking your crochet snowflakes is truly a game-changer when it comes to achieving those stunning, crisp results we all adore. It might feel like an extra step, but trust me, it’s totally worth it. Once you see how beautifully your creations come to life after blocking, you’ll wonder why you ever skipped this essential part of the process.
Remember, every stitch counts! By taking the time to carefully block your snowflakes, you’re giving them the chance to shine and show off all that hard work you put into crocheting them. You’ll be amazed at how much more defined the edges become, and those intricate details that seemed lost will pop right out. You might even find yourself getting creative with shapes! And don’t forget about experimenting with different blocking techniques! It’s not just about making your snowflakes look good; it’s also about enjoying the process and celebrating the effort you’ve put in. Happy crocheting!


